- Python Pillow - Home
- Python Pillow - Overview
- Python Pillow - Environment Setup
- Basic Image Operations
- Python Pillow - Working with Images
- Python Pillow - Resizing an Image
- Python Pillow - Flip and Rotate Images
- Python Pillow - Cropping an Image
- Python Pillow - Adding Borders to Images
- Python Pillow - Identifying Image Files
- Python Pillow - Merging Images
- Python Pillow - Cutting and Pasting Images
- Python Pillow - Rolling an Image
- Python Pillow - Writing text on image
- Python Pillow - ImageDraw Module
- Python Pillow - Concatenating two Images
- Python Pillow - Creating Thumbnails
- Python Pillow - Creating a Watermark
- Python Pillow - Image Sequences
- Python Pillow Color Conversions
- Python Pillow - Colors on an Image
- Python Pillow - Creating Images With Colors
- Python Pillow - Converting Color String to RGB Color Values
- Python Pillow - Converting Color String to Grayscale Values
- Python Pillow - Change the Color by Changing the Pixel Values
- Image Manipulation
- Python Pillow - Reducing Noise
- Python Pillow - Changing Image Modes
- Python Pillow - Compositing Images
- Python Pillow - Working with Alpha Channels
- Python Pillow - Applying Perspective Transforms
- Image Filtering
- Python Pillow - Adding Filters to an Image
- Python Pillow - Convolution Filters
- Python Pillow - Blur an Image
- Python Pillow - Edge Detection
- Python Pillow - Embossing Images
- Python Pillow - Enhancing Edges
- Python Pillow - Unsharp Mask Filter
- Image Enhancement and Correction
- Python Pillow - Enhancing Contrast
- Python Pillow - Enhancing Sharpness
- Python Pillow - Enhancing Color
- Python Pillow - Correcting Color Balance
- Python Pillow - Removing Noise
- Image Analysis
- Python Pillow - Extracting Image Metadata
- Python Pillow - Identifying Colors
- Advanced Topics
- Python Pillow - Creating Animated GIFs
- Python Pillow - Batch Processing Images
- Python Pillow - Converting Image File Formats
- Python Pillow - Adding Padding to an Image
- Python Pillow - Color Inversion
- Python Pillow - M L with Numpy
- Python Pillow with Tkinter BitmapImage and PhotoImage objects
- Image Module
- Python Pillow - Image Blending
- Python Pillow Useful Resources
- Python Pillow - Quick Guide
- Python Pillow - Function Reference
- Python Pillow - Useful Resources
- Python Pillow - Discussion
Python Pillow - Adding Padding to an Image
Adding padding to an image involves adding a border around it. This is a useful technique while adjusting the image's size without changing its aspect ratio or trimming it. Padding can be added to the top, bottom, left, and right sides of the image. This is particularly important when working with images that have important information at the edges, which you want to retain for tasks like segmentation.
The Pillow (PIL) library provides two functions, pad() and expand(), within its ImageOps module for adding padding to images.
Padding Images with ImageOps.pad() function
The pad() function is used to resize and pad an image to a specified size and aspect ratio. It allows you to specify the output size, resampling method, background color, and positioning of the original image within the padded area. Syntax of this function as follows −
PIL.ImageOps.pad(image, size, method=Resampling.BICUBIC, color=None, centering=(0.5, 0.5))
Where,
image − The image to resize and pad.
size − A tuple specifying the requested output size in pixels, in the format (width, height). The function will resize the image to this size while maintaining the aspect ratio.
method − This parameter determines the resampling method used during resizing. The default method is BICUBIC, which is a type of interpolation. You can specify other resampling methods supported by PIL. Common options include NEAREST, BILINEAR, and LANCZOS.
color − This parameter specifies the background color of the padded area. It supports the RGBA tuple also, like (R, G, B, A). If not specified, the default background color is black.
-
centering − This parameter controls the position of the original image within the padded version. It's specified as a tuple with two values between 0 and 1.
Example
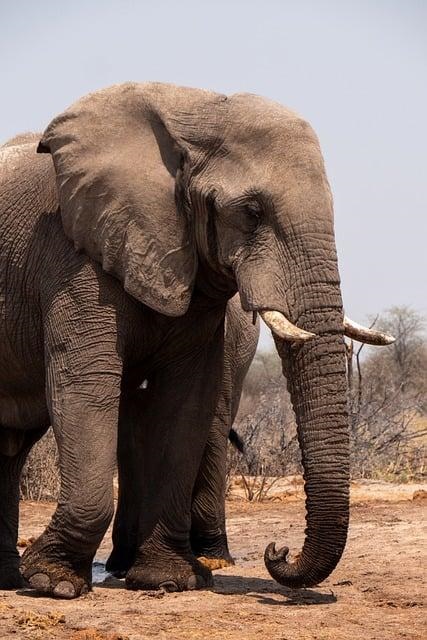
Here is an example that adds padding to an image using the ImageOps.pad() function.
from PIL import Image
from PIL import ImageOps
# Open the input image
input_image = Image.open('Images/elephant.jpg')
# Add padding to the image
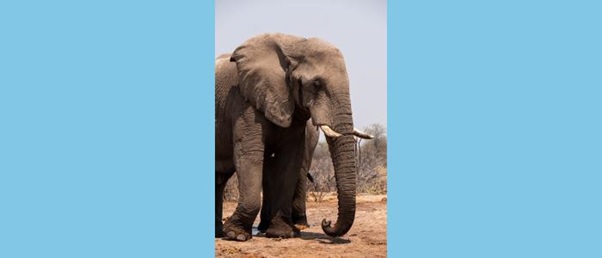
image_with_padding = ImageOps.pad(input_image, (700, 300), color=(130, 200, 230))
# Display the input image
input_image.show()
# Display the image with the padding
image_with_padding.show()
Input
Output
Output image After resizing with padding −
Adding Borders with the ImageOps.expand() function
The expand() function adds a border of a specified width and color around the image. It is useful for creating a decorative frame or emphasizing the content of the image. Its syntax is as follows −
PIL.ImageOps.expand(image, border=0, fill=0)
image − The image to expand the border.
border − The width of the border to add, specified in pixels. It determines how wide the border will be around the image. The default value is (0).
fill − The pixel fill value, which represents the color of the border. The default value is 0, which corresponds to black. You can specify the fill color using an appropriate color value.
Example
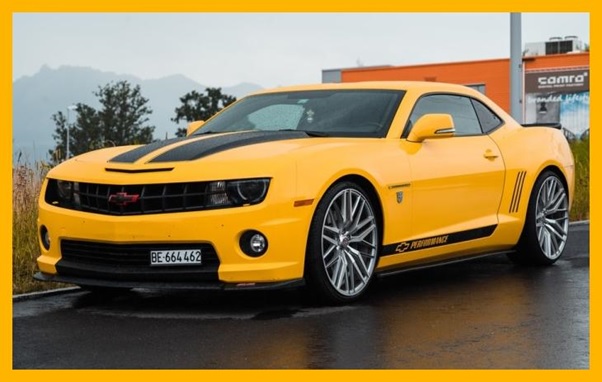
Here is an example that adds padding to an image using the ImageOps.expand() function.
from PIL import Image, ImageOps

# Open the input image
input_image = Image.open('Images/Car_2.jpg')

# Add padding of 15-pixel border
image_with_padding = ImageOps.expand(input_image, border=(15, 15, 15, 15), fill=(255, 180, 0))

# Display the input image
input_image.show()

# Display the output image with padding
image_with_padding.show()
Input
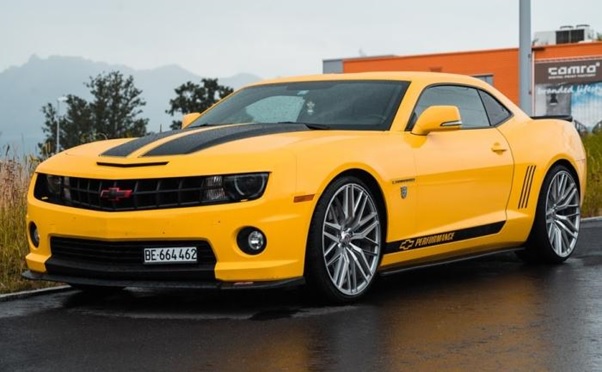
Output
Output image with padding −