- Next.js - Home
- Next.js - Overview
- Next.js - Project Setup
- Next.js - Folder Structure
- Next.js - App Router
- Next.js - Page Router
- Next.js Features
- Next.js - Pages
- Next.js - Data Fetching
- Next.js - ISR
- Next.js - Static File Serving
- Next.js - Pre-Rendering
- Next.js - Partial Pre Rendering
- Next.js - Server Side Rendering
- Next.js - Client Side Rendering
- Next.js Routing
- Next.js - Routing
- Next.js - Nested Routing
- Next.js - Dynamic Routing
- Next.js - Parallel Routing
- Next.js - Imperative Routing
- Next.js - Shallow Routing
- Next.js - Intercepting Routes
- Next.js - Redirecting Routes
- Next.js - Navigation and Linking
- Next.js Configuration
- Next.js - TypeScript
- Next.js - Environment Variables
- Next.js - File Conventions
- Next.js - ESLint
- Next.js API & Backend
- Next.js - API Routes
- Next.js - Dynamic API Routes
- Next.js - Route Handlers
- Next.js - API MiddleWares
- Next.js - Response Helpers
- Next.js API Reference
- Next.js - CLI Commands
- Next.js - Functions
- Next.js - Directives
- Next.js - Components
- Next.js - Image Component
- Next.js - Font Component
- Next.js - Head Component
- Next.js - Form Component
- Next.js - Link Component
- Next.js - Script Component
- Next.js Styling & SEO
- Next.js - CSS Support
- Next.js - Global CSS Support
- Next.js - Meta Data
- Next.js Advanced Topics
- Next.js - Error Handling
- Next.js - Server Actions
- Next.js - Fast Refresh
- Next.js - Internationalization
- Next.js - Authentication
- Next.js - Session Management
- Next.js - Authorization
- Next.js - Caching
- Next.js - Data Caching
- Next.js - Router Caching
- Next.js - Full Route Caching
- Next.js - Request Memoization
- Next.js Performance Optimization
- Next.js - Optimizations
- Next.js - Image Optimization
- Next.js - Lazy Loading
- Next.js - Font Optimization
- Next.js - Video Optimization
- Next.js - Script Optimization
- Next.js - Memory Optimization
- Next.js - Using OpenTelemetry
- Next.js - Package Bundling Optimization
- Next.js Testing
- Next.js - Testing
- Next.js - Testing with Jest
- Next.js - Testing with Cypress
- Next.js - Testing with Vitest
- Next.js - Testing with Playwright
- Next.js Debugging & Deployment
- Next.js - Debugging
- Next.js - Deployment
- Next.js Useful Resources
- Next.js - Interview Questions
- Next.js - Quick Guide
- Next.js - Useful Resources
- Next.js - Discussion
Next.js - CSS Support
In Next.js, you can apply styling particular to a component or global styling that affect all components. In this chapter, we will explore what are styling methods used in Next.js app, how to style a module and how to apply global style.
Styling Next.js App
Next.js supports different ways of styling your application, such as,
CSS Modules in Next.js
In Next.js we can use CSS modules to specify styles to a particular component explicitly. The style specified by this method will not affect any other components.
Styling a Next.js Module
A stylesheet defined explicitly for any Next.js module should end with .module.css extension. You cannot use element selectors in css ( like h1, p ) inside css module styles, these are allowed only inside Next.js global CSS styles. In Next.js module, you can use "styles.className" or "styles.idName" to get class or id names from CSS file. See the example below.
// app/about/page.tsx

// Import the CSS module
import styles from './about.module.css';


export default function About() {
  return (
    <div className={styles.div}>
        <h1 className={styles.h1}>About Us</h1>
        <h2 className={styles.h2}>
            Welcome to the Next JS About page!
        </h2>
    </div>
  );
}
After defining the above component, create css file in same folder with following code.
// app/about/about.module.css file

.div {
    font-family: Arial, sans-serif;
    padding: 20px;
    background-color: #f9f9f9;
    border: 2px solid;
    border-radius: 10px;
    max-width: 500px;
}

.h1 {
    color: #0070f3;
}

.h2 {
    color: #333;
}
Output
In the output you can see that CSS styles are only affecting "About" module.
Setup Tailwind CSS in Next.js
Tailwind CSS is a utility-first CSS framework for designing websites by using its utility-first pre-defined classes. You can use tailwind CSS with Next.js project. When you create a Next.js app, you will be prompted to include tailwind css in the setup. If you choose to include tailwind css, Next.js will automatically download and install tailwind CSS along with Next.js project. Follow the steps below to manually setup tailwind css in your Next.js project.
Step 1: Install Tailwind CSS
In Next.js project directory, Install tailwindcss and its peer dependencies via npm, and then run the init command to generate both. Run following codes in your project terminal.
// Install tailwind
npm install -D tailwindcss postcss autoprefixer

// Initialize tailwind
npx tailwindcss init -p
Step 2: Configure template paths
After the above step, you will see a new file "tailwind.config.ts" in project directory. In the file add path all of your template files. This will specify extension of files that are using tailwind css. Use the following code.
// ./tailwind.config.ts

/** @type {import('tailwindcss').Config} */
module.exports = {
  content: [
    "./app/**/*.{js,ts,jsx,tsx,mdx}",
    "./pages/**/*.{js,ts,jsx,tsx,mdx}",
    "./components/**/*.{js,ts,jsx,tsx,mdx}",

    // Or if using `src` directory:
    "./src/**/*.{js,ts,jsx,tsx,mdx}",
  ],
  theme: {
    extend: {},
  },
  plugins: [],
}
Step 3: Add the Tailwind directives
Now, add the @tailwind directives for each of Tailwinds layers to your globals.css file. Use the following code in your global.css file.
// ./global.css

@tailwind base;
@tailwind components;
@tailwind utilities;
Step 4: Start Using Tailwind in Your Project
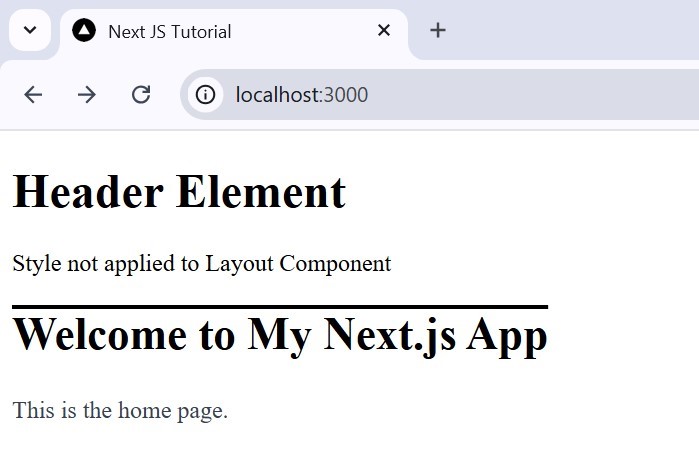
Now you can use tailwind css utility classes to style any component in Next.js application. Following is code for styling Home page component of Next.js app.
//app/page.tsx

export default function Home() {
    return (
        <div>
            <h1  className="text-3xl font-bold overline" >
                Welcome to My Next.js App
            </h1>
            <p className="text-base text-gray-700" >
                This is the home page.
            </p>
        </div>
    );
  }
Output
Following will be output of above code.
Next.js SASS Support
SASS is a CSS pre-processor, which helps to reduce repetition with CSS and saves time. Next.js has built-in support for integrating with SASS after the package is installed using both the .scss and .SASS extensions. You can use component-level SASS in CSS Modules by ".module.scss" or ".module.SASS" extension.
Install SASS
To use SASS in Next.js application, first we need to install SASS in your project directory. Run the following code.
npm install --save-dev sass
Customizing SASS Options
You can configure SASS options inside "next.config.ts" file. In the below code code we added additional data as a variable red color. Also you can use the implementation property to specify which type of Sass implementation to use. By default, Next.js uses the sass package.
// ./next.config.ts

import type { NextConfig } from 'next'

const nextConfig: NextConfig = {
  sassOptions: {
    additionalData: `$var: red;`,
  },
}

// Specify implementation
const nextConfig: NextConfig = {
  sassOptions: {
    implementation: 'sass-embedded',
  },
}

export default nextConfig
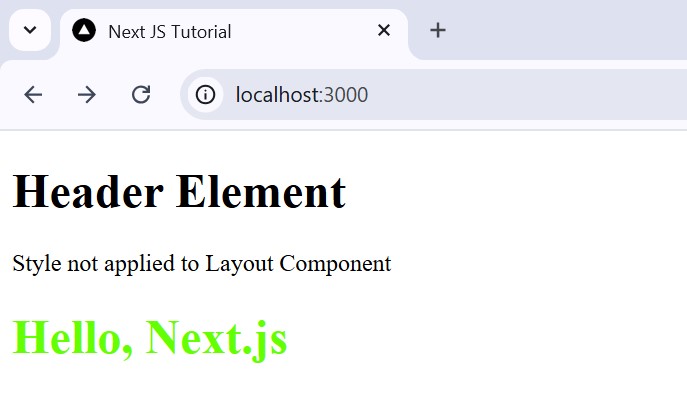
Example of SASS in Next.js
Following code is example for using SASS in Next.js.
// app/variables.module.css
$primary-color: #64ff00;

:export {
  primaryColor: $primary-color;
}


// app/page.tsx
import variables from './variables.module.scss'

export default function Page() {
    return  <h1 style={{ color: variables.primaryColor }}>
                Hello, Next.js!
            </h1>
}
Output
The below image shows output of above code.
Next.js CSS-in-JS
In Next.js, CSS-in-JS is a popular approach for styling React components. It allows you to write styles directly in JavaScript, scoped to individual components. Next.js supports CSS-in-JS libraries like styled-components, Emotion, and its built-in styled-jsx.
Note: CSS-in-JS libraries which require runtime JavaScript are not supported in Server Components. It's recommend to use CSS-in-JS only in client components.
Using Styled JSX
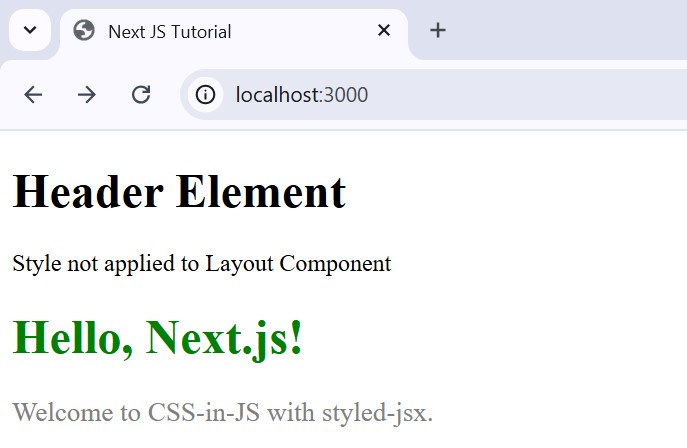
Next.js have built-in support for styled-jsx. By this, you can style components with scoped CSS and without additional dependencies. Following is code for styled JSX in Next.js home page.
// /app/page.tsx

'use client';

export default function Home() {
  return (
    <div>
      <h1>Hello, Next.js!</h1>
      <p>Welcome to CSS-in-JS.</p>
      <style jsx>{`
        h1 {
          color: green;
        }
        p {
          font-size: 18px;
          color: gray;
        }
      `}</style>
    </div>
  );
}
Using Styled Components
Styled-components is a third-party library that leverages tagged template literals to style components. To use this first you need to install this in your project. Run the following code.
npm install styled-components

npm install --save-dev babel-plugin-styled-components
Now, you can use styled components in your Next.js components. Following is code for home page.
// /app/page.tsx

'use client';

import styled from 'styled-components';

const Title = styled.h1`
  color: green;
`;

const Paragraph = styled.p`
  font-size: 18px;
  color: gray;
`;

export default function Home() {
  return (
    <div>
        <h1>Hello, Next.js!</h1>
        <p>Welcome to CSS-in-JS.</p>
    </div>
  );
}
Output
Following will be output of above codes.